Well, it's that time of year when I feel the need to see how my hair holds up in a blown out and curled state. I know many naturals refrain from using a lot of heat on their hair to reduce heat damage, but I've been doing this for years and never experience heat damage with the right types of products for my hair type. For this hair styling escapade, I decided to apply Liquid Lanolin on wet hair as my heat protectant and blow dried my hair with my hand held drier on high heat...yes I said HIGH heat, but no worries or heat damage.
My hair gets really straight and can easily be worn without further heat manipulation, but I wanted some curls so I whipped out my SUPER OLD 1" barrel Gold-n-Hot hair curlers; and YES, the curlers work like new. Before starting the curling process, I applied ULI pressing wax to each section of hair as an additional heat protectant.
Day 1: Curls are soft and bouncy. No product build up. No greasy feeling.
During the time frame of this curl experience, the weather in Alabama was cooler and rainy due to Tropical Storm Karen. This also provided an excellent test to see how my hair would hold up in high humidity. Although I wasn't outside while it was raining nor even got wet while sporting my curls, the moisture from the air can sometimes add frizz. However, the weather didn't significantly impact or distort my curls. Even my high impact exercising had relatively minimal impact. My theory is that after I worked out at the gym, I would apply a nickel size amount of Liquid Lanolin around the perimeter of my head, then brush from root to the beginning of the curl. This helped smooth out my roots. Then I tied a satin scarf around my head to hold my roots in a straight position while the scarf absorbed any moisture. I removed the scarf before bed and used the pineapple method. I did NOT use any rollers at night to maintain my curls. I wanted to see how my curls would fall and flow during the duration of this style.
Day 6: This is how my hair looked after applying Liquid Lanolin and scarf to reset roots.
From the title, it sounds like a blog post about a new dance, but instead it is a polish escapade using the LacQit One Step Gel Spring 2013 collection. I decided to test out an unlikely combination; Tangerine Tango and Pop on this Purple. Check it out in my latest video:
I started out with 2 coats of the Tangerine Tango as my first color and cured each coat using my LED lamp. Next, I used nail tape to create an X shape near the upper portion of my nails.
I used more nail tape to create another X above the first one, making sure to leave a small space between the first X and second X. This will look similar to railroad tracks crossing over each other. Once the tape was in place, firmly press down to avoid any bleeding of the polish underneath the tape.
Next I used the Pop on this Purple color to paint above the first X all the way to the tip of my nail. Cure the 2nd color and apply another coat to enhance the sparkling effects.
Once the polish was cured, I removed the tape from each nail.
I've tried an assortment
of gels and creams, but there is one that is a keep sake in my hair arsenal;
that is good 'ole Eco Styler gel. I started using Eco Styler back in 2009 after hearing about it from some other Naturalistas on YouTube. The Eco
Styler combined with Castor Oil created massive curl definition for me and
provided great hold. But in this "How To" video, I decided to try a different combination.
In my past videos, you will notice the use of Liquid Lanolin for many of
my styles, so I decided that I should test it out with the Eco Styler gel.
You will notice in the
video that I did not rinse out the Alba Botanica Hawaiian Coconut Milk
conditioner. My reasoning behind this was that I felt the conditioner would help reduce the crunchy feeling that I get
when using gels alone. I got this idea when I first started wearing
Wash-N-Goes using Kinky Curyly products. I would use the Kinky Curly
Curling Custard and the Knot Today Leave-In Conditioner along with Castor Oil
to seal in moisture. Using those 3 products would always leave my hair
soft and well defined for the duration of the style (usually 7-10 days).
When I first started applying the liquid lanolin on top of the Alba Botanica Hawaiian Coconut Milk conditioner, I couldn't tell that the lanolin was actually on my hair. All I could feel was the conditioner. As a result, I added a little more of the lanolin to each section and focused on working it onto the ends of my hair. Even when I began applying the Eco Styler with Olive Oil gel (level 10 hold), I could not tell whether the gel was on my hair. However, I continued to apply and shingle as usual...and hoped for good results. After the application process, I lightly misted my hair with water to give my hair concoction a boost and then allowed my hair to air dry. In the pictures at the end of my video, you will see how my hair progressed from Day 1 through Day 7. I must say that my results were AWESOME. Throughout the week, my hair remained soft and well defined. Even my gym escapades did not jeopardize my curl definition nor create excessive frizz. I didn't have to mist my hair with water until Day 5 to reshape the style, but really could have reshaped without it. The Liquid Lanolin and Eco Styler gel combo is a winner in my book!
Day 1
This is how my hair looked on Day 1 after styling. Although it is still wet in this picture, my curl definition is visible.
Day 7
By Day 7, my hair still maintained a lot of curly definition. I decided to switch the look up by doing a simple up-do.
Below are a list of highlights about the products I used:
There is a wide variety of Eco Styler gels. I've only used the Olive Oil formula which is a level 10 hold.
Eco Styler gels can be purchased from stores like, WalMart, Sally's Beauty Supply, WalGreens, and CVS.
A 32 fl oz container costs less than $5.00.
Liquid lanolin can be purchased online. I actually purchased a 4 fl oz bottle from the Vitamin Shoppe for around $8.00.
Eco Styler does NOT contain Alcohol.
Eco Sytler DOES contain Hydrolyzed Wheat Protein for those of you who may be sensitive to this form of protein.
LacQit One Step Gel Polish has released the 2013 Summer Color Collection and the owner, Nanci Spencer, sent me some colors to try out. I decided to get a little creative and use a combination of various colors to create some nail magic. Check out my demonstration video below.
Nail art definitely adds flare to the overall look of pampered hands, but as an amateur, it is a challenge...but in a good way. The challenging aspect of nail designing is that I seem to spend hours trying to decide what look I'm going for and what color combination I should use. So in this attempt, I finally decided to use the 3 colors listed below:
In a Blue Streak
It's a White Out
A Flare for Pink
I started off with In a Blue Streak as my first color. Next, I used nail tape to section off a portion of my nails to create a color block using the It's a White Out color. Lastly, I used A Flare for Pink to create mini dots and abstract curves. Below are a few pictures of my final results:
I am always looking at creative nail art work on Pinterest and wanting to give it a try, but always talking myself out of it...until now. For the past 2 weeks, I've been wearing the LacQit Cosmo to Go color, so I wanted to spice up the look. Using 3 LacQit One Step Gel polishes, a dotting tool and nail tape (both purchased from Amazon.com), and a nail decal (purchased at Sally's Beauty Supply Store), I set out on my FIRST attempt at nail designing.
Items used
After deciding on a design, the application process was simple. I used the nail tape to section off a portion of the nail so that I could add the Pop the Cork color. I followed with using my dotting tool to add about 7-8 dots toward the lower portion of the nail to create a subtle burst of color with a combination of Road Trip with Rosie and Pop the Cork colors.
These days, there are so many curling gels on the market offering those with natural hair a plethora of options. I recently watched some fellow YouTubers demonstrate their application process using Gorilla Snot Hair Gel or Moco de Gorila. I've been doing wash-n-goes using the shingling method for years using products like Kinky Curly, Uncle Funky's Daughter, Eco Styler Gel, and the list goes on (LITERALLY). So, it made me want to try this Gorilla Snot out for myself.
I purchased the Gorilla Snot Hair Gel at a local Walgreens for $2.99. This gel comes in a few different hold/strength levels, so I picked level 9 out of 10. I felt this would give me the hold I need without too much of a crunchy feeling or that helmet hair look after it dries. Now keep in mind that this gel is used by various ethnicities, such as Hispanics or Latinos to create spike styles. With that in mind, who would have guessed it would be suitable to maintain wash-n-goes of those of us with curly textures. My impressions of the Gorilla Snot Hair Gel: Display Look & Feel: The design of the container is cleverly funky yet very practical because it allows you to easily squeeze out the product due to the fact that the bottom of the container is also the lid. This eliminates the need to turn the container upside down to get that last tiny weeny bit of product out.
Smell: Very pleasant scent with a hint of lemon smell.
Cost: $2.99 + tax....no further cost point analysis needed:-)
Gel Look & Feel: This gel has a slime consistency. It is sticky, but not as sticky as some other gels I've used. As my hair was drying, I didn't have a sticky residue feeling on my face or neck, so that is a plus.
Ingredients off the bottle: Water, PVP, Alcohol, PEG-150, Sorbital, Hydroxyethylcellulose, Triethanolamine, Carbomer, Cyamposis Tetragonoloba (Guar) Gum, Fragrance. Hair Impact Review: The Gorilla Snot Hair Gel is good, but the alcohol seems to have caused frizz by Day 2. Although my curls remained defined, my day 3 hair had more volume than expected. I decided to lightly spritz my hair with water and add some of my shea butter mixture for moisture. I repeated as needed on the following days. Overall, I will continue to use this product and tweak my regime to see if I can reduce some of the volume and retain more curl definition throughout the week.
Day 1 results using Gorilla Snot Hair Gel
Application Process:
I applied Castor Oil and Lanolin Oil to wet hair from root to tip.
I applied a generous amount of Gorilla Snot Hair Gel to each section.
I smoothed sections of hair from root to tip to allow my natural curl pattern to take shape (Shingling Method). NOTE: In some areas I used my Denman brush to help separate my curls.
I allowed to air dry from morning until night.
I pineappled my hair with a satin hair tie.
Take a look at my application process and more pictures in my video.
Sometimes you just don't feel like shampooing & conditioning your hair just to get a new style so you begin to realize that nothings wrong with reviving a style and saving time to do other things. Well, my hair goes through a lot of those "reviving" situations too not only save time, but also to reduce the chance of my hair and scalp being stripped during the shampooing process.
With this in mind, I decided to give the Curl Popper product another try to refresh an old braid-out. This time, I just lightly misted my hair with water then mixed my shea butter mixture and Curl Popper together before applying to my hair. This was applied to each section of hair before braiding. Since my hair wasn't soaking wet, I let it air dry and slept wearing a head wrap. The next morning, my hair was completely dry and ready for take down. I got great definition and shine!
In the days that followed, I just added a small amount of Curl Popper to wet hands then applied to each section and re-braided to maintain the style each day until time for my next shampoo & condition regime.
Here's my demonstration using Curl Popper to refresh an old braid-out.
Although I knew the natural hair phenomenon had spread like
a forest fire, I didn’t think the age range of women strutting their natural
crown of glory would be so broad until I recently attended a natural hair forum
in Birmingham, Al. This event was hosted
by Dr. Dianne Coleman, a cosmetic chemist and instructor, who has developed her
own line of natural hair products. The
event was held one Saturday afternoon from 2-5 pm at the Crestwood Festival
Center. When I arrived there were other
vendors show-casing their businesses, which offered the event attendees an
opportunity to mingle while waiting for the main symposium to start. There was a mid-size crowd of approximately
40-50 eagerly awaiting the opportunity to ask natural hair care tips at this symposium.
One key take away was Dr. Coleman’s
advice on the importance of moisturizing and sealing in the moisture for healthy
hair growth and length retention.
Unlike a classroom room full of unenthused students, these
women asked question after question, took notes, and shared their personal hair
experiences. By the end of this event,
Dr. Coleman had given several door prizes and I was the recipient of a full
size bottle of her Curl Popper (the original formula). Of course after winning, I thought it would
be a good idea to test out her product and share my results.
The application process of the Curl Popper potion was simple. After shampooing &
conditioning (with Alba Botanica products), I applied castor oil to my hair
while wet. Next, I sectioned my hair into four sections and applied a liberal
amount of the Curl Popper potion to each section of hair. I locked in the moisture by using my shea
butter mixture (see mixture ingredients below) then braiding my hair. Due to the thickness of my hair, I sat under
my hooded dryer for 2 hours using a low heat setting until my hair about 80% dry.
You will notice in my video that I did over saturate my hair
with my shea butter mixture, so I decided to use a bandana to cover my hair at
night so that it would absorb some of the oils.
This really worked wonders because when I styled my hair, I had a smooth
finish without an oily or weighed down feeling/appearance. Also, I didn’t have to add more oil for the
entire week. I noticed that the lanolin I added really enhanced the shine and
reduced frizz. After high aerobic
exercising throughout the week, the roots of my hair remained smooth with
minimal frizz. In addition to the use of
lanolin, the reduction of frizz is also attributed to the fact that about 2-3
nights out of the week to help maintain the braid out, I just re-braided at
night and tied on my bandanna.
My shea butter mixture consists of the following ingredients. I used a hand mixer to blend the ingredients
until it reached a fluffy texture very similar to whipped cream or butter cream
frosting. Note: I have been using this
mixture as my hair and body moisturizer for about 6 weeks; enjoying it thus far.
Well, it's been 21 days since I applied the LacQit One Step Gel Polish so this weekend it was time to remove it. Wearing LacQit has been a unique experience for many reasons. First, the fact of being able to wear polish for longer than 3-5 days without it chipping is a phenomenon in itself. Second, having access to polish for home use without spending a fortune is amazing and budget friendly. Third, the attention it draws from others when they find out I did it myself as some people have asked, "Who did your nails" and look at me in disbelief when I say, "Oh, I did them" as they take my hand closer to their eyes to examine my nail application ability AND with the look of disbelief in their eyes.
I've been paying closer attention to gel polish worn by others and inquiring about their gel polish experience. Recently, I ran into a friend at the mall as she was heading to a nail salon to have her gel polish reapplied. She had been wearing a pretty nude color for 3 weeks, but I noticed that it had a significant amount of chipping. The cost to have the old polish removed and fresh polish applied was $20. This was a good price because a fellow grad student recently told me that she paid $60 and her polish started chipping during week 2. Okay...let's calculate this up from these 2 examples. There are 52 weeks in a year, so if you get your nails polished every 3 weeks then that averages to be roughly 17 trips to the nail salon per year. In ONE years time, that would equate to $340 for the polish application and removal at the $20 rate and $1,020 for the polish application and removal at the $60 rate.
With the yearly cost of gel manicures ranging from $340-$1,020 and beyond, you still should take into consideration the sanitary condition of the tools used on customers. A workout buddy of mine was telling me about someone she knew who had to have a toe nail removed due to a bacterial infection she picked up in a "high-end" nail salon. More of a reason to reduce or eliminate visits to nail salons.
Using an at home gel system, such as LacQit would currently cost $59.95 + tax and shipping. This price includes the LED lamp, 1 color (Cosmo to go), timer, cuticle oil, 2 cuticle sticks, 2 nail buffers, and a nail file. Additional colors cost about $16 each. A big savings overall compared to going to the nail salon.
Now on to the LacQit (Pronounced: Lac-it) removal process:
I used the foiling method to remove the LacQit polish. By doing so, it prevented the acetone from quickly evaporating from my nails. So using cotton balls, I soaked each with 100% acetone, applied to each nail, and covered with a piece of foil (NOTE: use a piece just large enough to wrap around and cover the nail). Using this method, I soaked for 10 minutes. I then removed the foil from ONE nail and in a downward motion, I used the cuticle stick to scrap the polish off. When finished with that nail, I decided to reapply the acetone soaked cotton ball and the foil back to the nail to soften the remaining residue on the nail; thus making it easier to do my final clean up. I repeated this process until all nails were polish free.
So I know you are wondering what challenges I had during the removal process of the LacQit polish. For me, the challenges were applying the foil because I was basically working with one hand, which kind of made me feel clumsy. When you watch the video, you will notice the awkwardness of wrapping the foil over the cotton ball. Also, another thing I did was over saturate the cotton balls, so the acetone did drip out until I secured the ends of foil. However, I had a paper towel underneath my hands to catch the leakage and my technique improved by the time I got to my second hand. Keep in mind this was my first time EVER applying and removing a gel polish, so the challenges too me are minuscule.
Below are the items I used during the removal process:
100% Acetone: Purchased at Wal-Mart for $2.50 for a 16 fl oz bottle.
Cotton balls: Previously purchased store brand at Wal-Mart.
Aluminum foil: Previously purchased the inexpensive generic brand at Wal-Mart. I just used the same foil used for cooking.
Cuticle Stick: Provided in the LacQit kit. Used to scrap off polish after the soaking process.
Yellow Nail Buffer: Provided in the LacQit kit. I actually didn't have to use the buffer but you can use it to buffer away any polish residue on your nails.
Paper towel: Used to catch the polish shavings as I scrapped off the polish. Makes for easy clean up after you are finished.
Be sure to check out the awesome NEW colors at www.lacqit.com
Take a look at my video demonstrating the removal process of LacQit.
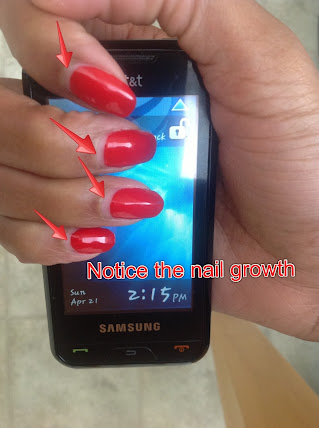
In my 8 day follow up video on the LacQit gel polish, the same radiant shine of the gel polish was as visible as it was on the 1st day it was applied. Well, I'm PLEASED to announce that as of my 15th day wear of LacQit Gel Polish that the only noticeable difference is the significant nail growth (notice the natural nail growing from the cuticle in the pictures below). I strongly feel that the nail growth by the end of next week (which will be 3 weeks of wearing this color) will make it mandatory to remove this polish. So at that point, I will do a video demonstration on the removal process and share my experience.
The pictures below show the 15 day results of LacQit One Step Gel Nail System.
This polish was applied on April 6th.Here's a link to the video demonstrating the application process.
This is the 8 day follow up video of the LacQit application.
This is my 8th day wearing the LacQit (Pronounced: LAC-IT) One Step
Gel Polish. From the video below,
you can see that I have the same lustrous shine that I had on Day 1. However, I did have a nail emergency…I broke my
thumb nail while doing BURPEEs (see Wiki description) at the gym. The impact of quickly hitting
the floor in push-up position did cause the polish to rip along the torn edge
of my nail. However, the nail did not break into the skin,
which has always been the outcome for this particular thumb nail. I contribute this to the firm support and density
of the gel polish, which acted as a buffer between my nail and the floor. I was able to cut the remaining fragmented edges
and file without massively disfiguring the remaining polished area. I opted not to retouch the thumb nail to see how
well the gel polish manages after the bonding of the polish has been disturbed.
I've applied the LacQit cuticle oil to my cuticles approximately 3 times within these past 8 days, so they are not showing any signs of cuticle damage from the gel polish or the use of the LED lamp. The oil, which is a blend of almond oil. jojoba, and rice bran oil, is very light and does not leave an oily residue. It absorbs within seconds, so I haven't had to worry about getting oily stains on my clothing. Let’s see what happens going into week 2.
Stay tuned…..
At home gel nail systems have caused a BIG BUZZ in the nail and beauty
product communities for about the past 3 years. Why is this phenomenon
so important you might ask? Well, those who visit manicure/pedicure salons
are very familiar with the longer lasting polish wear, averaging 14+ days with
minimal chipping that gel nail polish offers. However, the cost averages
around $25 and up for ONLY a manicure. For those who prefer to be
budget conscious, realize that $25 every 2 weeks averages to be around
$650 per year... AND this is on the LOW end. Think about how you could redirect
that money if you could achieve the same professional look at home.
Well, the nail industry is making it more affordable with the at home nail
systems. Retailers like Sally's, Ulta, Sephora, and Amazon have showcased brands
such as Gelish and Redcarpet. More recently local stores, like WalMart,
Walgreens, and CVS have brought attention to SensatioNAIL and other gel systems.
Although, I've never tested any of those brands, a lot of reviews that I've
read indicate customer satisfaction. However, a caveat to those gel
systems is the use of 3 polishes (i.e. base coat, gel polish, and top
coat) which cures using a UV or LED lamp within 3-5 minutes.
Since being introduced to the gel nail systems for at home use, I couldn't
decide which one to try...not until I ran across a new ONE STEP product in
Canada...YES....ONE STEP using a LED lamp. The product is called
LacQit (Pronounced: LAC-IT).
U.S. retailers should take notice of this product, especially before the Thanksgiving
and Christmas holiday seasons because the LacQit system would definitely draw the
attention of women from every socio-economic background. Mother’s Day is right around the corner, so
if you are looking for a gift, this would make your mom/wife/sister/friend VERY
happy! Think about it…for the cost of
about 3 manicures at a nail salon, they can continuously use this gel nail
system at home. Each 10ml bottle of
polish equates to about 30 applications.
LacQit is on Facebook and Pinterest. The web site is www.lacqit.com
The application process was as easy as applying 2 coats of regular nail
polish, but WITHOUT the long drying time, thanks to the LED lamp. I’ve done a demonstration of the application
process, so check out my video below:
The kits contain the following:
Technologies used
Action on my Nails
LacQit Pro LED Lamp
Cured the nail color.
1st coat: cured for 30 seconds
2nd coat: cured for 60 seconds
10 ml Nail Color (Cosmo to Go included in the kit)
Added a high gloss color pigmentation to my nails.
10 ml Moisture Cuticle Oil
Replenished moisture to my cuticle beds after the polishing process.
Nail file
Shaped nails.
Buffers
Used to remove shine from nails BEFORE applying gel polish.
Cuticle (Manicure) Sticks
Used to push cuticles back BEFORE applying the gel polish.
Timer
Used to accurately time the use of the LED lamp to cure gel polish.
When doing various tasks, we often think of the finished
outcome without thinking of the steps used to achieve the end result. Before the use of the Internet, learning
occurred from books and classroom teaching.
However, in the 21st century, we learn how to perform various
tasks from visual aids (i.e. YouTube) and/or support guides (i.e. manuals) that
are available on the Internet. YouTube, viewed
as a communication medium, has transformed learning into a social event. Think
about it for a second…as spectators, we access YouTube to find content on an
assortment of topics. However, the funny
thing is that you never really think about the “learning” that is taking place. Instead, it is viewed as entertainment that
provides unlimited access for continuous use.
Through repetitive use, learning is taking shape.
In my first YouTube video, I demonstrated the shampoo &
conditioning process used on my hair with a specific product (i.e. Alba
Botanica). The focus of the video is not
on my hair type or length, but the effect the product had on my hair.
The second video goes further by illustrating
the combination of my styling technique (i.e. Heat styling) with a customized product
mixture (i.e. Lanolin mixture) to obtain my desired finished style. In the table below, I have listed each
technology used along with an explanation of the action it performed on my
hair.
Share your technologies and the actions they provide for
you. What are you learning about those
technologies and actions you encounter?
Technologies used
Action on my Hair
1.Shampoo
Cleansed hair while providing softness.
2.Conditioner
Allowed for easy detangling and manageability.
3.Water
·Removed shampoo & conditioner.
·Aided in restoring moisture.
4.Wide Tooth Comb
Separated and detangled hair into sections.
5.Hair Claps
Held sections of hair in place which reduced re-tangling of hair with
other sections.
6.100% Cotton Towel
Absorbed excess water from hair after the shampooing &
conditioning
7.Hand Dryer
Stretched the state of hair from curly to straight.
8.Lanolin Mix ( Extra Virgin Olive Oil,
Glycerin, Liquid Lanolin)
·Protected hair from heat damage while blow
drying.
·Added moisture.
·Added shine.
·Reduced frizziness.
9.Flatiron
Used to add slight curly to hair before applying rollers.
There
are many Bloggers and VLoggers these days on various social media sites. I am an avid spectator of Youtube to learn
the latest on topics, such as, natural hair styling techniques, female fitness and
healthy eating techniques, technology tools for computers, tablets, and
smartphones, beauty and fashion accessories, and the list goes on and on. I’ve had a strong desire to become a
contributor of this learning community, but felt that the YouTube community was over-saturated with many of the same topics thus providing limited opportunity of
finding interested followers to become spectators of my chronicled experiences. I’ve shared this interest with a couple of friends,
who, in return, have suggested that I transition from the spectator sideline into
the role of practitioner. So this starting
me to thinking, the role of a practitioner is often viewed as that of a “doctor”; well at least in my mind.
Okay,
okay, I know this analogy is more on the abstract side, but let me explain my
thought process before you jump off my bandwagon. My definition of doctor is someone who
“practices” a certain action on
themselves or others in search for
plausible outcome(s) or solution(s).
My interest, or “specialty” from the perspective of a doctor, covers a
broad spectrum of technology focused topics. My specialty focuses on topics that will allow
my audience to spectate then “Do It Yourself” or as most refer to in the
colloquial form, D.I.Y.
I think
many of you will agree that the increased use of technology helps us share our
practices and outcomes; thus, allowing spectators to discover new D.I.Y. solutions. But here’s some food for thought: What is technology? Many people would immediately say computers,
tablets, software, hardware, etc. Those responses are definitely adequate, but
also limited. Technology, from my
perspective, is a mechanism that acts
as a communication medium for an action to occur. As you can see this encompasses a lot more
than the traditional computer related tools.
From this viewpoint, this Blog and my VLog on YouTube will involve this
technology philosophy. Hence, the birth
of the D.I.Y. doctor